Materials, Tools, and Techniques for Outdoor Track
Posted: Mon 3. Nov 2014 15:56
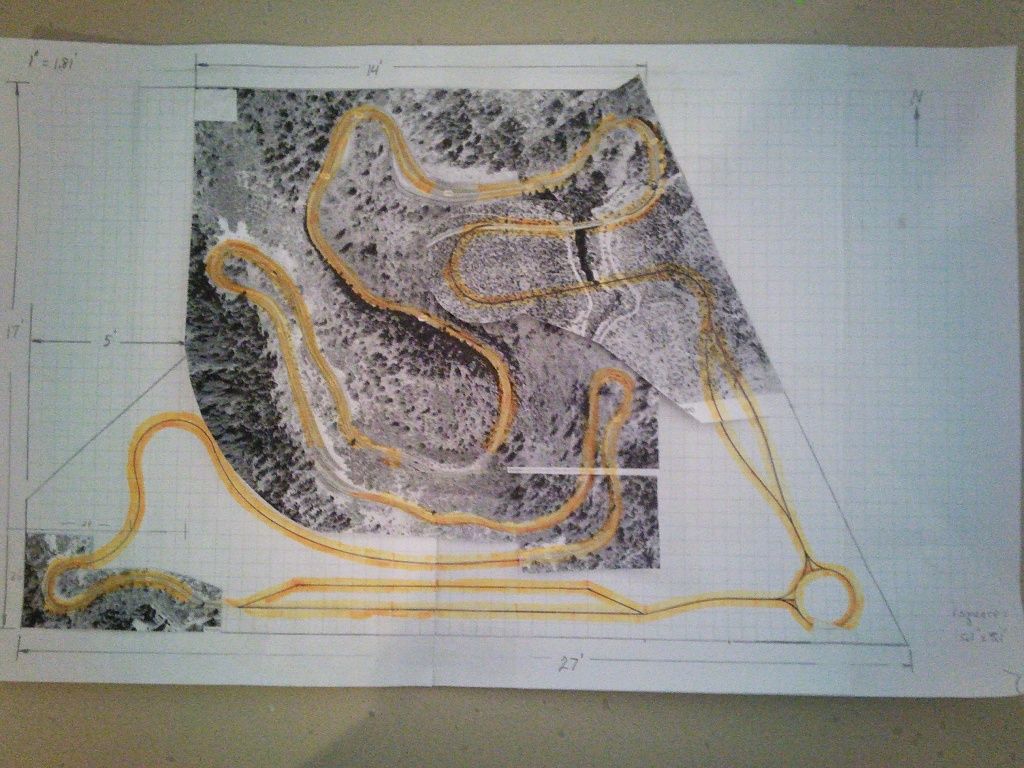
I have been experimenting with materials, tools, and techniques for building a road course permanently located on the ground outside in Sedona, Arizona, USA. Normal low temperature is 15° F and normal high temp is 100° F for a typical year. We get less than 18" of rain a year and about 2" of snow. The sun is extremely intense in June. The latitude is 35 degrees north. Much of the circuit will be a compact representation of a portion of AZ highway 89A between Sedona and Flagstaff, known locally as the switchbacks. When complete the circuit will be about 130 ft long with a 3 ft change in elevation.
Over a period of 5 months I have tried at least 10 different combinations of materials, tools, & techniques. I have decided that any material made of wood fiber, such as MDF, will not work outside on the ground because it expands, contracts, wraps, and twists too much with changes in humidity, or exposure to rain, even with 3 coats of paint on the top, bottom, and all the edges.
I have found that 1" thick Owens Corning FOAMULAR extruded polystyrene pink insulation board works best as the baseboard for my track which is made in sections and attached directly to the ground after excavation and grading. This material which comes in 4' x 8' sheets is not affected by moisture but an 8' piece painted medium/dark gray will expand about .25" when ambient conditions change from 65 F in the shade in the morning to 100 F in the direct sun at noon in mid June on a clear day in Sedona. I estimate that the track surface reaches about 150 F when exposed to direct sunlight at noon in June. The vast majority of the expansion is caused by the intense radiation. It would expand less if the surface were painted white.
This insulation board is not resistant to UV radiation nor is it resistant to solvents such as paint thinner, acetone, mineral spirits, xylene, etc. It must be painted with water based coatings to protect it from UV. Adhesives with strong solvents must be used very sparingly and very carefully. Compared to 3/8" thick MDF, this 1" thick insulation board is much lighter in weight, and much easier to cut, drill, sand, and bend. However it is not strong or tough.
Following are the steps I take in making a section of track which is usually 12" to 16" wide and 4' to 8' long:
1) Glue 2-3 smaller pieces of board together, if needed. Sand track surface at joints if needed due to variations in thickness of board.
2) With foam roller, apply 1 coat of white elastomeric roof coating to top surface and any edge that will be exposed to direct sunlight.
3) With a fine black felt tip pen, precisely indicate where the piano/music wire is to be embedded in the surface. A flexible lexan strip available from oldslotracer.com works well for drawing complex curves.
4) With .060" x 1.25" brads (nails) attach a straight edge or flexible lexan strip as needed to serve as a guide for cutting a groove in the board. These nails can be pressed into the board without any tools.
5) With a .035" diameter router bit in a Dremel tool with a router attachment, cut a slot about .038" deep.
6) With the aid of a wallpaper seam roller press 36" long pieces of .032" diameter straight music wire into the slot and cut to length as needed. (I use .032" x 36" music wire because it works very well and it is cheap and readily available from ACE Hardware.) Leave about a .060" gap between the ends of 36" long pieces of wire to allow for expansion, if track will be exposed to very intense sunlight. Leave shorter gaps between shorter pieces. Avoid gaps in tight curves by using a single piece of wire. Do not include a gap close to a lane change.
7) Remove the wire from the slot. Run a tiny bead of glue in the slot and then replace the wire using the roller to press it down flush with the track surface. Wipe off any excess adhesive. Do NOT use PVA glue, also known as wood glue, carpenter's glue, and white glue because it is acidic and will cause the wire to rust if the track gets wet. The adhesive you use is extremely important, if the track will get wet. The proper adhesive/sealer will prevent the wire from rusting. (Beware, many adhesives are acidic.) Do not count on 2-3 coats of water based paint to protect the wire from rusting. I know from experience. I had to throw out about 30' of track.
8) After the glue has cured, using a small artist's paint brush, apply a coat of elastomeric roof coating over the wire and immediately scrape off the excess with a straight wide blade putty knife. This helps to hide the wire and hold it in the slot.
9) Patch nail holes and any dents in the board. When dry apply 2 more coats of elastomeric roof coating to the entire top surface of the board.
10) Now color the entire surface with water based exterior flat house paints and decorate as you wish.
With all of the roof coating and paint on the track surface, it is quite tough and easy to clean. I glue sections of track together using 8"-12" wide pieces of insulation board placed under the seam/joint. Then I seal those joints with caulking compound or elastomeric roof coating and paint. Many types of adhesives will work for connecting sections together. I also glue cleats of scrap insulation board approximately every 24" under the track to prevent the track from sagging.
I would appreciate any ideas for building an outdoor track or improving on what I am doing.
 [/url]
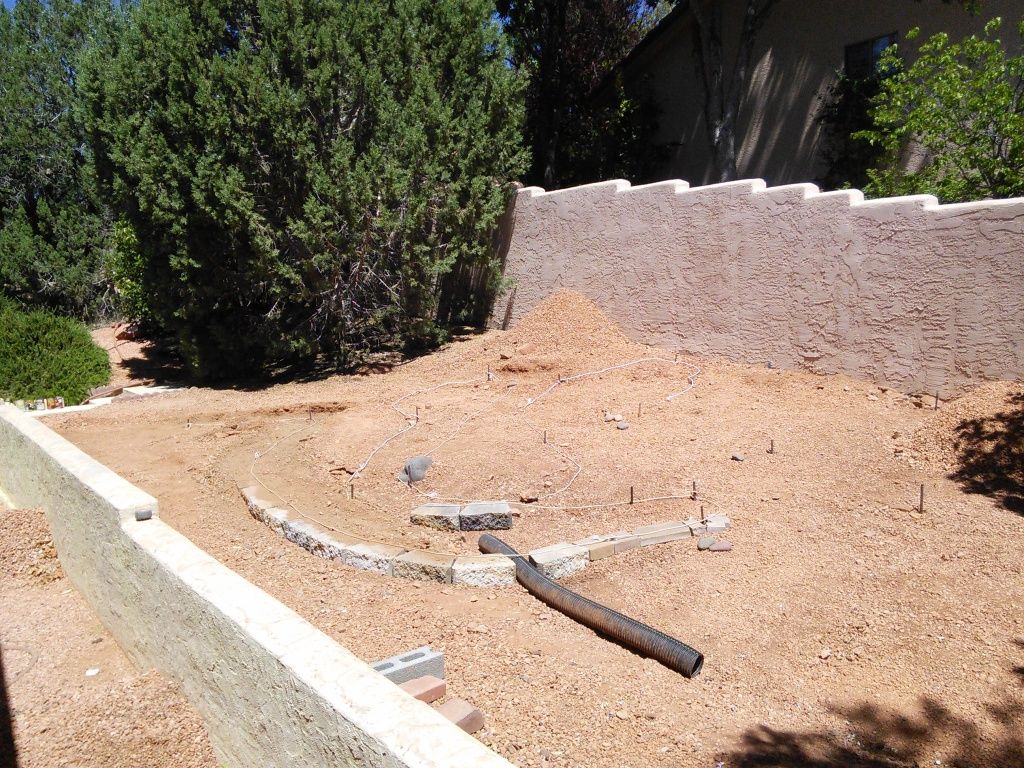 [/url]
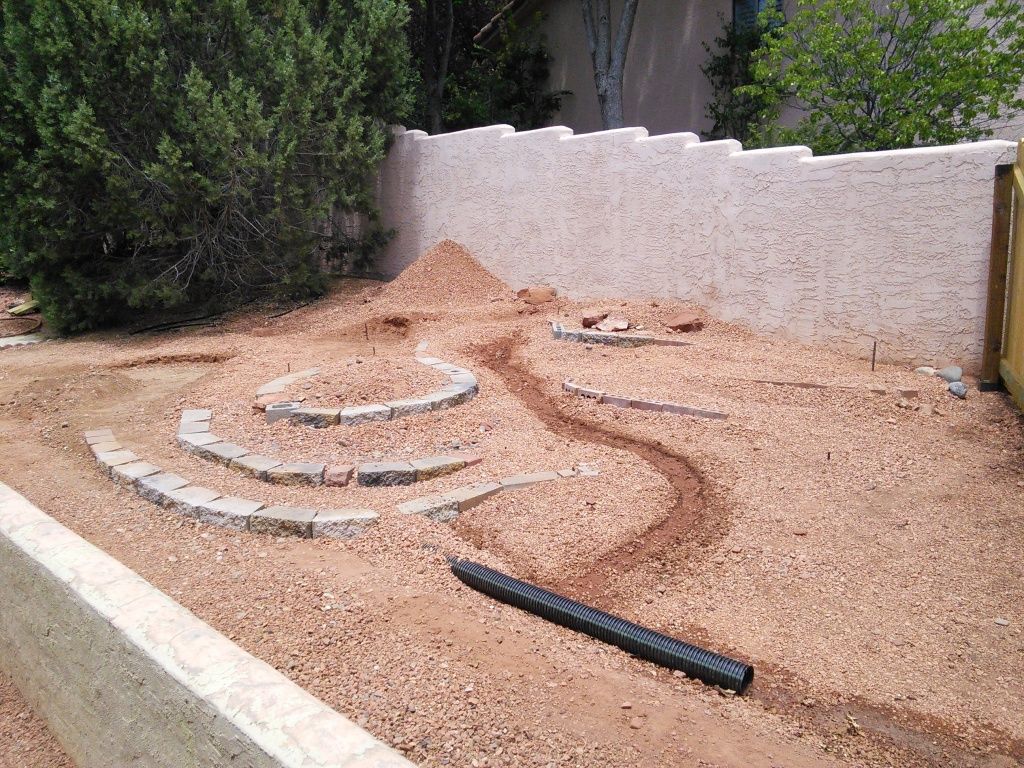 [/url]